


 レシピを投稿する
トップ > 「バス・トイレ・洗面」のDIYレシピ > 洗面台の破損をDIY修理しました♪
洗面台の破損をDIY修理しました♪

MIYABIN
2018年07月12日
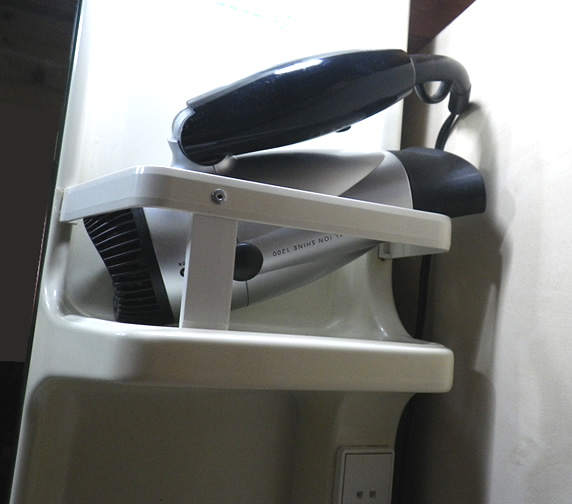
洗面台の棚のところの根元のプラスチックが割れてしまったので(ToT) ハンドリベッターという工具を使って自分で直してみました♪
かかった費用: 50円
所要時間: 1時間
いいね
2
お気に入り
0
このレシピをシェア


材料
プラスチック板 1つ
瞬間接着剤 1つ
リベット 1つ
瞬間接着剤 1つ
リベット 1つ
工具
カッター
ハンドリベッター
カッターマット
ハンドリベッター
カッターマット
step1
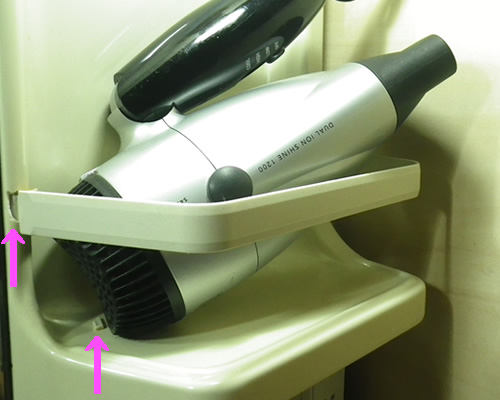
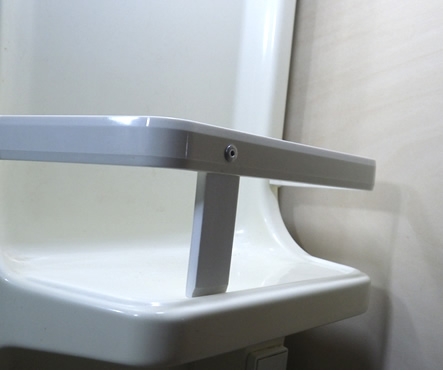
洗面台のここ(↑左の矢印)がいつも置いているドライヤーの重さに耐えきれず・・・バキッ!っと割れてしましました(/*_*)
そのカケラが右側矢印↑の物です。 まぁ、こんな大きさのドライヤーをここに置くなって話しですがZZzz...
step2
一度は接着剤でカケラをくっつけましたが、ちょっと力が加わるとすぐにまた外れちゃいました。(ノ◇≦。)
とりあえず厚紙でつっかえ棒みたいにしてこれいじょう折れないようにしてましたが強度的にも見た目的にも限界なので^^; 修理開始!

step3
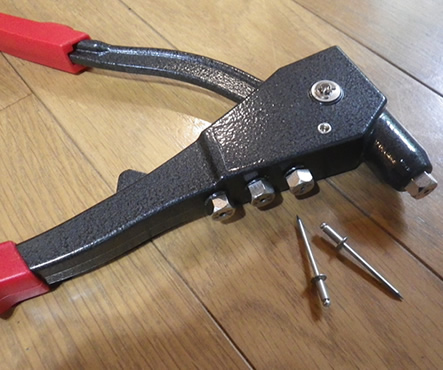
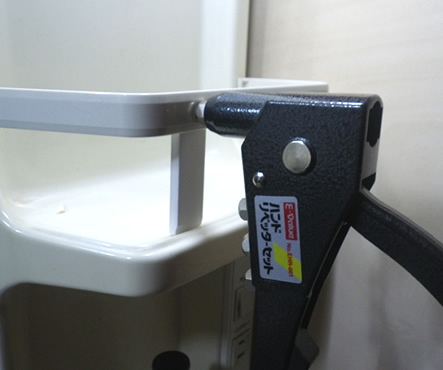
ここで登場したのがハンドリベッターセット!
パッケージのイラストがカンタンにできそうに見えて、DIYに向いているかんじがしたので前に買っておいたんです♪

step4
リベッターはボルトやネジが使えないところにも使える便利な工具です。3.2mm・4mm・4.8mmなど、リベットのサイズに合わせてリベッターの先に付いている金具を取り替えて使うようです。
step5
先日のキッチン修理の時に使ったプラ板が余ってたのでそれを使い、カッターナイフなどで形を整えました^^ なんでこんな形なのかというと・・・

step6
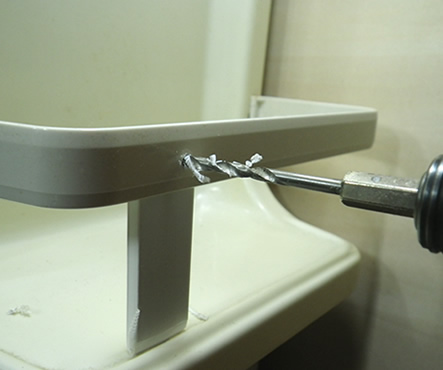
ドリルで1カ所、思い切って穴を空けちゃいました! もう後戻りできません(^ω^ )笑

step7
そして開けた穴に、先ほどのプラ板パーツの飛び出してる部分のみを差し込みつつ、こちら側はまたドリルで穴あけちゃいました!
step8
ドリルで開けた穴にリベットを差し込みます。そしてリベッターをセットします。
step9
ハンドルをギュッ握ると、リベットの中芯が引っ張られます、もう一度ギュギュ!っと握るとバキンッ!と芯が外れます。これでしっかりくっつきました(^o^)/

step10
プラ板が白だったので、洗面台の色とマッチしています♪ リベットの頭は白く塗ろうと思ったけど・・・飾りとしてむき出しのままでイイと思ったのでそのままに。
step11
根元は瞬間接着剤で付けておきました。これでしばらくは根元が折れることもなく使えると思います!ヾ(⌒▽⌒)ゞ

step12

コツ・ポイント
リベットのサイズに合わせてリベッターの先を付け替えるのですが。この品は先端パーツが4個あるのにサイズの刻印が無いので分かりにくい!なのでマジックで「3.0」「4.0」などど書いて保管してます。
やってみた感想
リベットを使うとそれがアクセントになるのでけっこう好きです♪ もともとこうなってたかのように仕上がりました!自画自賛!?ヾ(。>v<。)ノ゙*

このレシピのキーワード
いいね
2
お気に入り
0
このレシピをシェア
ログインしてコメントする
このレシピを投稿したユーザー
投稿済みレシピ(6)

2019年02月11日
2018年11月05日
2018年09月16日

2018年08月08日
2018年07月12日

