


 レシピを投稿する
トップ > 「メンテナンス・お掃除」のDIYレシピ > 黒い靴限定!汚れた靴の復活DIY!
黒い靴限定!汚れた靴の復活DIY!

モクレン800
2018年11月24日

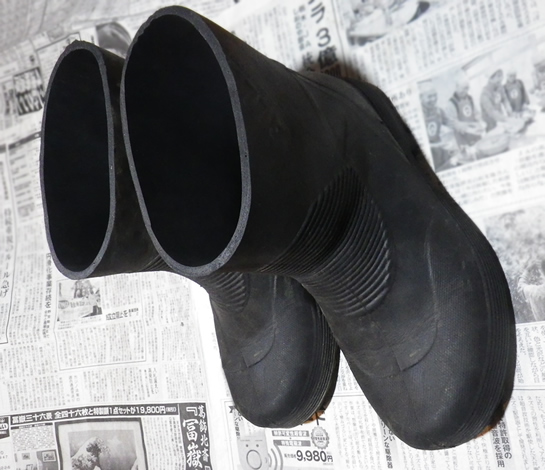
使い古した作業用の黒い靴の底が剥がれてきて、見た目もくすんできてしまったけど、底を直せばまだ使えそうだったので身近なアイテムを使って復活させちゃいました!!
かかった費用: 300円
所要時間: 半日
いいね
2
お気に入り
0
このレシピをシェア


材料
ラッカースプレー・艶消しブラック 1本
G17ボンド 1本
G17ボンド 1本
工具
step1
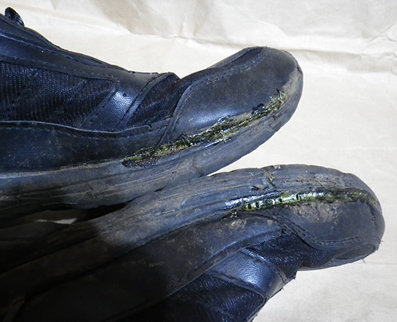
作業するときに使いやすくて愛用してた靴ですが・・・色んなところが割れてきてそろそろ寿命か?・・・と思いつつも、復活DIYでもう少し頑張ってもらいますよ!

step2
けっこうどこのホームセンターでも売ってるG17ボンド!強力・速乾なのでこれを使います!小さめのは100~200円で買えます!

step3
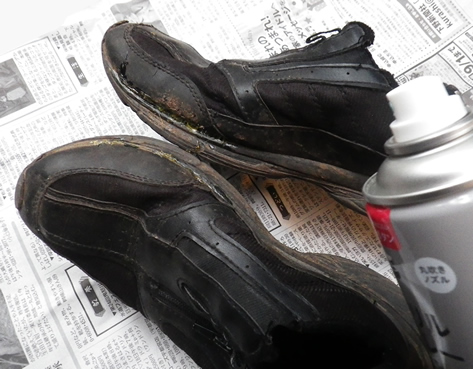
内側の剥がれたところにボンドを注入していき、ギュッと押しつけて半日~1日くらい乾燥させます。お見苦しい写真でスミマセンm(_ _)m くっつきにくい時は靴の中に新聞を入れて重しを乗せもいいです。
step4
かかとのところもボンドを注入!靴の色も落ちてるしボンドが黄色いので、このままではすごく目立っちゃう(XoX)汗

step5
そこで登場するのが・・・艶消しブラックのラッカースプレー!!!これで全体を塗っちゃいます!何回かに分けてまんべんなくプシュープシューっと!
step6
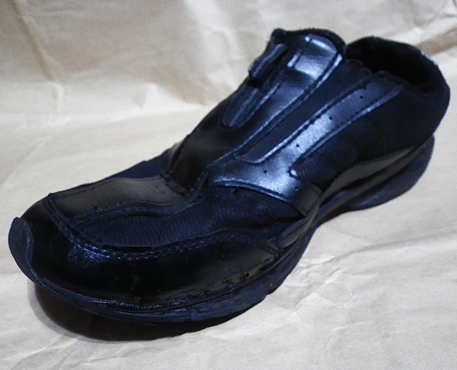
そうすると・・・アラ不思議!見違えるようなブラックの靴になりました!黒い色は影の黒い部分と同化するので色むらが目立たず補修に向いてます!白とかピンクとか、黒以外の色ではこうはいきませんよ!色むらが目立って変になるかも...
step7
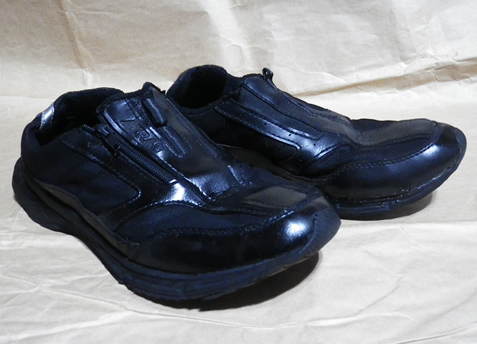
寿命間近の汚かった靴が復活しました!まぁ応急処置ではありますが、もう少し付き合ってもらいます(^o^)/
コツ・ポイント
黒いクツでもワンポイントが入っているようなクツは、塗りたくない所にマスキンテープなどを張ってから塗るといいです。布地用の専用スプレーとか使わなくても、ダメもとで補修するならラッカースプレーで十分です!
やってみた感想
手頃なラッカースプレーとボンドでここまで復活できれば十分!ダイソーとかでも小さい黒スプレーやボンドは売ってます!ツヤツヤにしたいなら艶消しではないブラックもアリ!捨てる前にぜひお試しを!!

このレシピのキーワード
いいね
2
お気に入り
0
このレシピをシェア
ログインしてコメントする
このレシピを投稿したユーザー
投稿済みレシピ(12)

2023年02月08日
2020年01月16日
2019年08月06日
2019年01月17日

2018年12月08日

