


 レシピを投稿する
トップ > 「メンテナンス・お掃除」のDIYレシピ > 電動ドリルにLEDを埋め込んでみた
電動ドリルにLEDを埋め込んでみた

saburi-ta
2018年05月30日

充電式の小さな電動ドリルはコンパクトで重宝するのですが、もともと付いていた極小の電球が弱くて頼りなかったので、LEDにできないかと試してみました。
かかった費用: 100円
所要時間: 30分
いいね
5
お気に入り
0
このレシピをシェア


材料
LEDバルブ単体 1個
配線コード 20cmくらい
収縮チューブ 5cmくらい
配線コード 20cmくらい
収縮チューブ 5cmくらい
工具
電動ドリル
ハンダごて
電流計
ニッパー
プラスドライバー
ハンダごて
電流計
ニッパー
プラスドライバー
step1
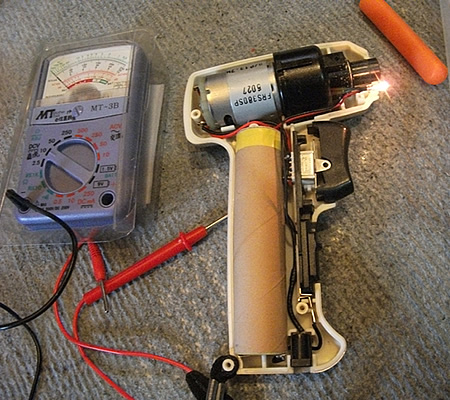
充電ドリルの電圧が下がってくると、極小ライトの光り方がさらに弱々しくなるので、その光量を覚えておきます。
そしてプラスドライバーで本体を開けます。

step2
本体を開けてみると、縦長のバッテリーとモーターとスイッチの間にライトの配線が割り込ませてある単純な構造でした。
電圧を測ってみると3.0~3.5Vくらいだったので、3.3V前後に対応するLEDバルブ単体を用意します。
step3
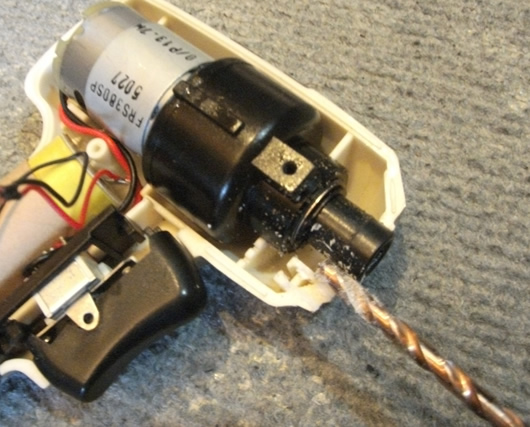
上がもともとの極小バルブ。下が新しいLEDバルブです。明らかにLEDバルブのほうが直径が大きいので・・・

step4
別のドリルでLEDと同じ直径の穴を空けます。
step5
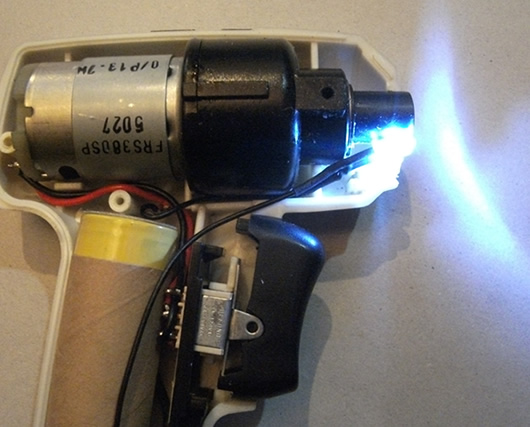
そこにLEDをはめ込み配線コードを繋ぎ合わせます。電圧は低いし数値の上下がほとんど無さそうなので、抵抗やコンデンサ類は付けずに繋ぎました。ハンダごてを使ってプラスマイナスの線を繋ぐだけなので簡単です。
step6
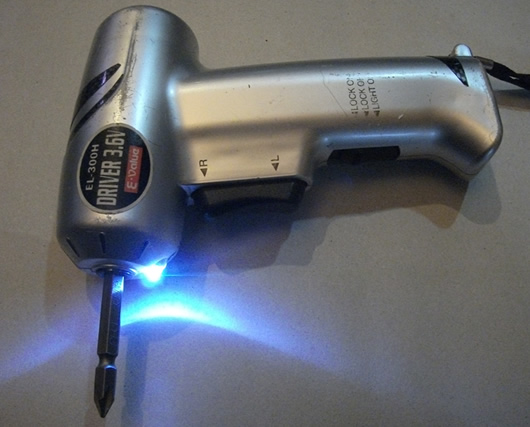
本体を戻して点灯確認!
白い光りで前より何倍も明るくなったのに省電力!
バッテリーにも負担のかかりにくいエコな電動ドリルとなりました。
コツ・ポイント
繋いだ配線が太くなりすぎると本体に入らなくなるので、配線の繋ぎ目は太くならないように注意します。
LEDには極性があるので、必ず点灯確認してから繋ぎの仕上げをします。
やってみた感想
新しい物を買ってしまえば早いけど、これだけの作業で工具がまた使いやすくなるならやってみる価値有りでした!
もっと早くやっておけばよかった!

このレシピのキーワード
いいね
5
お気に入り
0
このレシピをシェア
ログインしてコメントする

stelocielo
LEDバルブ本体はどちらで買えますか?
このレシピを投稿したユーザー
投稿済みレシピ(5)
2018年05月30日
2018年05月30日
2018年05月29日

2018年05月29日
2018年05月27日

