


 レシピを投稿する
トップ > 「DIYのHowTo」のDIYレシピ > サポートローラーの改良DIY
サポートローラーの改良DIY

Taatan
2018年09月25日
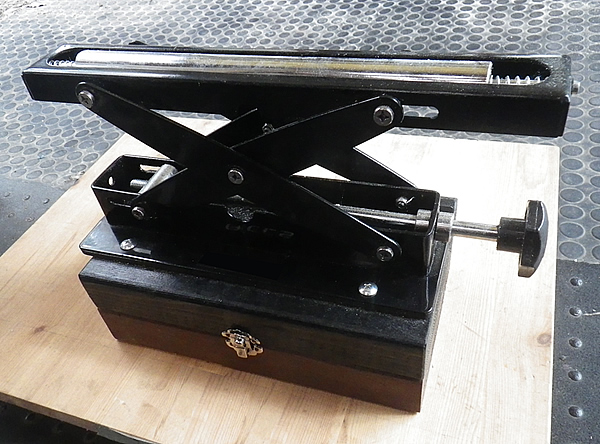
丸ノコなどの切断作業で便利なツールのサポートローラーの高さが足りない事がよくあるので、2×6材とパッチン錠を使って高さの自由度を広げてみました。
かかった費用: 500円
所要時間: 30分
いいね
3
お気に入り
1
このレシピをシェア


材料
2×6材 25cm×2本
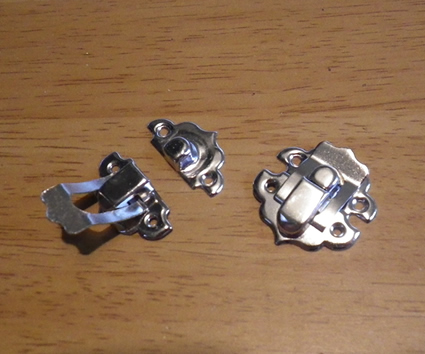
パッチン錠 2組
サポートローラー 1個
パッチン錠 2組
サポートローラー 1個
工具
丸ノコ
ディスクグラインダー
インパクトドライバー
ダボ穴用センターポイントピン
ディスクグラインダー
インパクトドライバー
ダボ穴用センターポイントピン
step1
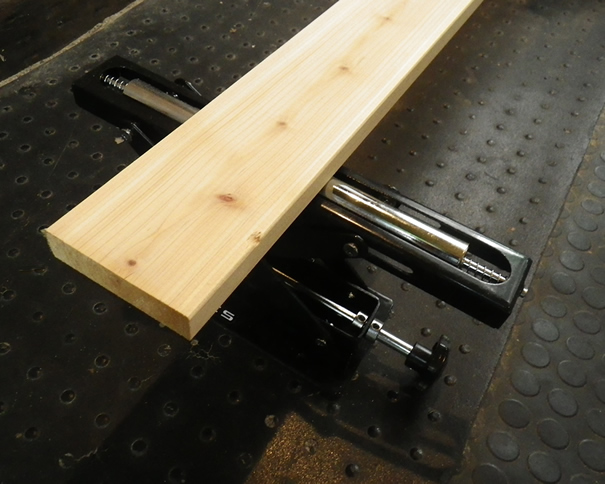
スライド丸ノコを使う時に、サポートローラーを平行位置に置くと、高さをいっぱいまで上げても足りないことがあります。
step2
黒く塗装した2×6材を1段取り付けました。これでも高さが足りません。

step3
そこで、もう1段2×6材を追加するのですが、低く使いたい時に取り外しができるようにするため、パッチン錠を使って脱着式にします。
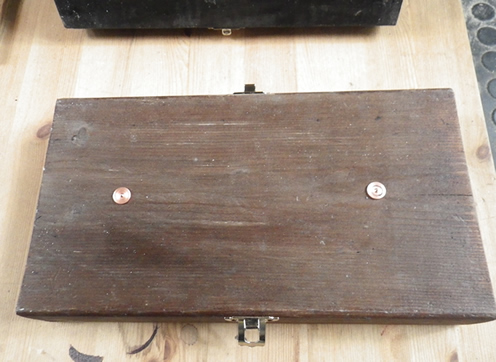
step4
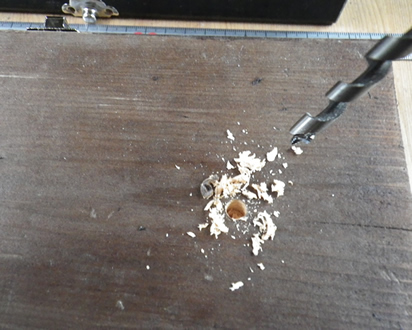
分かりやすくするため、2段目の2×6材は茶色にしました。ドリルで穴を開けてクギを打ってパッチン錠を取り付けます。

step5
設置する時にトンカチで叩くのですが、そのまま叩くとパッチン錠に傷が付くのでドライバーの柄を当てて叩くようにすると傷が付かずに叩けます。

step6
引っかけるだけのパッチン錠は、板が動くとズレて外れてしまうので、対策が必要です。

step7
このまま持ち上げようとすると、ロックしていてもちょっとナナメになっただけですぐに外れてしまいます。

step8
そこでこんな対策をしました。下の段の板に6mmのボアビットで穴を開けます。
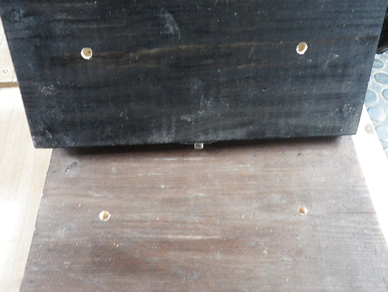
step9
2箇所穴を開け、6mm用のダボ穴用センターポイントピンを入れます。
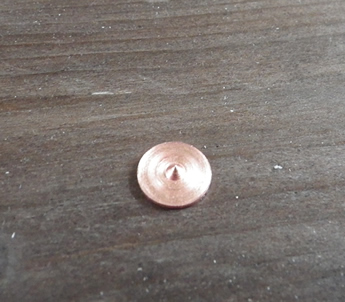
step10
これは中央に突起があって、ダボ穴に入れて接合したい板を上から合わせると、反対側の板の穴をあける部分のセンターに印を付けることができるものです。
step11
合わせる側の板に正確(下の板と同じ位置)にダボ穴を開けることができました。
step12
下側の板にだけ、ダボを接着材で接着します。出ているほうのダボは、少しだけ削って径を小さくしました。接着材が乾いたら完成!

step13
板が左右にズレなくなったので、パッチン錠のロックも外れずに持ち運びできるようになりました。ダボは下の段にしか接着されていないので、下段がいらない時はすぐに取り外すことができて便利です。

コツ・ポイント
パッチン錠はもう少し大きいタイプでも外れてしまうので同じような対策が必要です。下段を取り外した時にパッチン錠の金具が地面に当たらないようにするため、金具が長いほうが下段にくるように取り付けることがポイントです。
やってみた感想
普段使う高さがだいたい決まっているので、その範囲で高さ調整できるようになり、便利さがアップしました。段を付けたことで、調整用のツマミが回しやすくなったのは予想外の利点でした。

このレシピのキーワード
いいね
3
お気に入り
1
このレシピをシェア
ログインしてコメントする
このレシピを投稿したユーザー
日頃から身の回りの物や便利アイテムを作ったりしてDIYを楽しんでいます。
不便を感じたらそれを解消できる物を考え制作し、必要なパーツも市販で無ければ可能な限り自分で作ります。
大工などの経験は無いですが、今まで独自に得てきたノウハウやアイデアでどこまでやれるか日々挑戦中です!
投稿済みレシピ(175)
2026年03月29日
2026年03月26日
2026年02月28日
2026年02月26日
2026年01月31日

