


 レシピを投稿する
トップ > 「メンテナンス・お掃除」のDIYレシピ > 壊れたガーデンバケツ(ガーデンバッグ)を修理してみた
壊れたガーデンバケツ(ガーデンバッグ)を修理してみた

Taatan
2021年12月12日

落ち葉を集めて捨てる際に重宝するガーデンバケツが壊れて使えなくなってきたので、リュックサックに付いていたスリングを使って修理してみました。
かかった費用: 300円
所要時間: 30分
いいね
2
お気に入り
0
このレシピをシェア


材料
スリング 適量
バッグ用ミシン糸太タイプ#20 適量
バッグ用ミシン糸太タイプ#20 適量
工具
針
クランプ
クランプ
step1
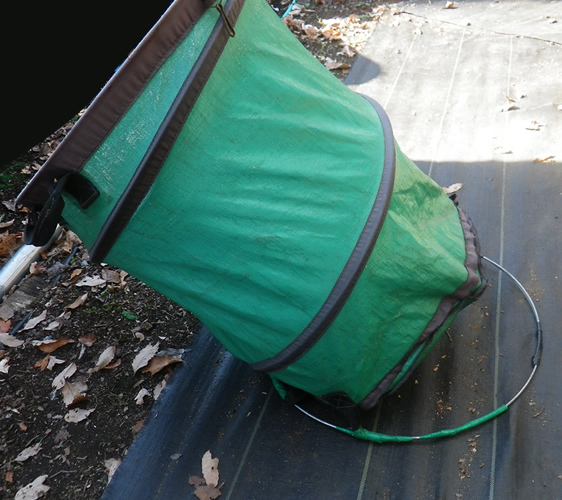
ガーデンバケツをぐるりと囲うように入っていた針金が底のほうから破れて出てきてしまってバランスを崩し、真っ直ぐ置いておけなくなりました。
step2
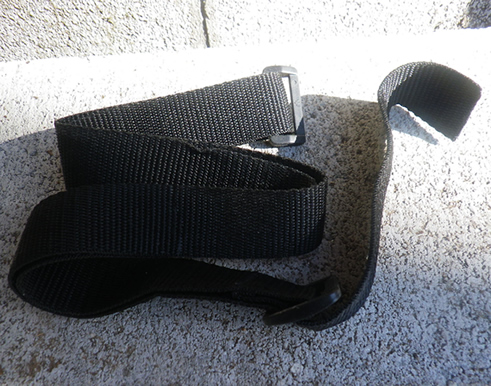
これをなんとか直すためにリュックサックについていたスリングのいらないのを用意し、これで直してみることに。
step3
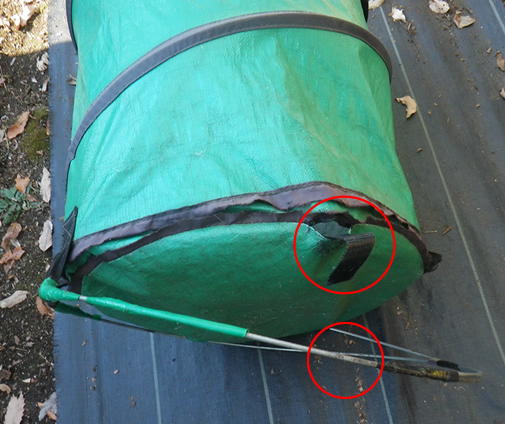
針金がもともと収まっていた部分と、飛び出た針金を引っ張るかんじでスリングを付けようと思います。
step4
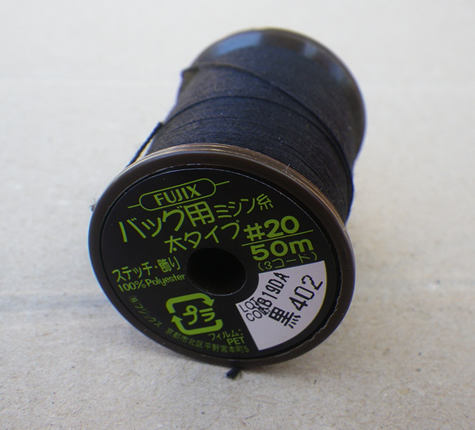
普通の裁縫用の糸だと耐候性など頼りないので、色々探してみたら「バッグ用ミシン糸太タイプ#20」という糸があったので、少しは耐候性に期待できるかもと思って購入しました。(1巻300円くらい)素材は100%ポリエステルで、絹や綿の糸より強度・伸度が1.5倍くらいあるそうです。
step5
ガーデンバケツの素材全体が劣化して縮んで弱っているので、針金が収まっていた箇所にそのまま戻すのは破れる可能性大で困難。なので、無理をせずに適度に引っ張って直します。

step6
クランプなどを使って一旦バケツを収縮させてから始めた方が縫いやすくなります。

step7
堅くて針が通らない時はペンチを使って通します。勢いあまって指を怪我しないように注意!

step8
片方は数センチ多めにバケツ素材のほうにスリングを縫い付け、針金を引っ張るように縫い付けました。これを外れた側の2箇所に付けたら完成!

step9
ガーデンバケツの機能性が復活!安定して地面に立たせて落ち葉拾いができるようになりました。

コツ・ポイント
スリングは端っこだけでなく、なるべく広い範囲に縫い付けた方が強度が上がります。よくある壊れ方だと思うので同じようなガーデンバケツを持っている方には簡単でお勧めの直し方だと思います。
やってみた感想
壊れて広がってしまった針金の底部分をそのまま生かし、スリングを使って適度な引っ張り具合にしたことで、もともとの形より底の面積が広くなってより安定したスタイルになりました。

このレシピのキーワード
いいね
2
お気に入り
0
このレシピをシェア
ログインしてコメントする
このレシピを投稿したユーザー
日頃から身の回りの物や便利アイテムを作ったりしてDIYを楽しんでいます。
不便を感じたらそれを解消できる物を考え制作し、必要なパーツも市販で無ければ可能な限り自分で作ります。
大工などの経験は無いですが、今まで独自に得てきたノウハウやアイデアでどこまでやれるか日々挑戦中です!
投稿済みレシピ(153)
2024年06月30日
2024年05月31日
2024年03月27日
2024年02月16日
2024年01月30日

