


 レシピを投稿する
トップ > 「雑貨・小物」のDIYレシピ > ★DIYでゲストハウス作ってみた★換気扇の設置
★DIYでゲストハウス作ってみた★換気扇の設置

Taatan
2022年10月25日

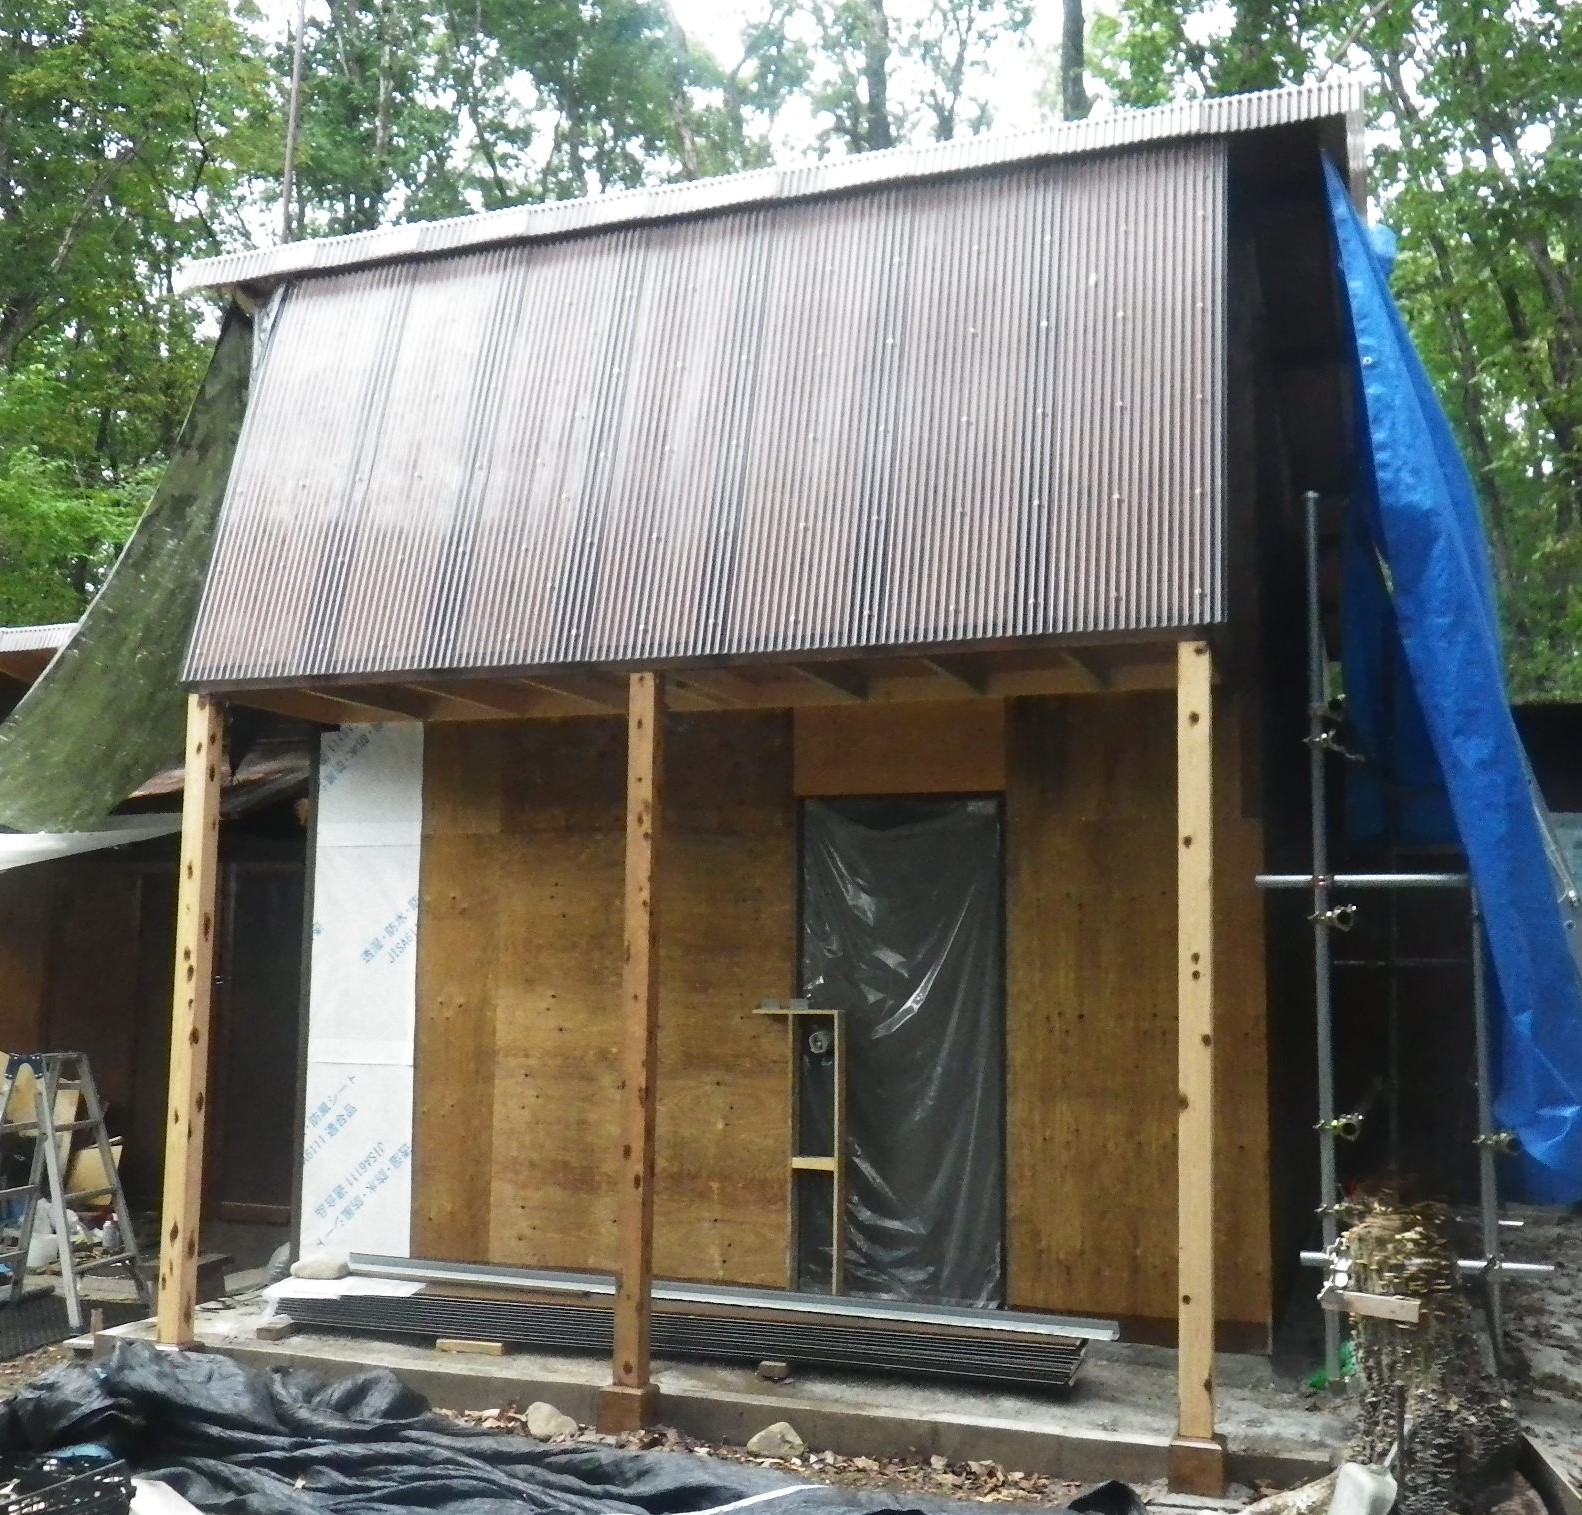
外壁がとりあえず一回り張り終えたので換気もできるようにしておきたいなと思い、室内の空気循環用の換気扇を取り寄せて設置してみました。換気扇の角度にクセがありましたが早めに気付いて対応できました。
かかった費用: 6,000円
所要時間: 2時間
いいね
2
お気に入り
0
このレシピをシェア


材料
換気扇 1
塩ビパイプVU管100 1本
2×4材 2本
塩ビパイプVU管100 1本
2×4材 2本
工具
丸ノコ
ディスクグラインダー
ディスクグラインダー
step1
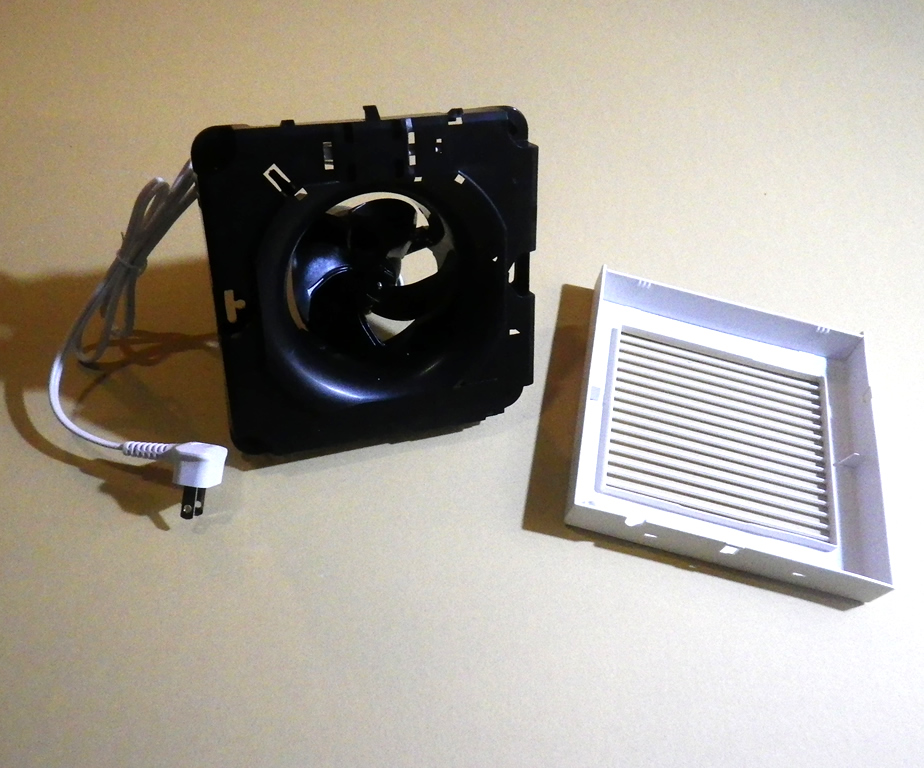
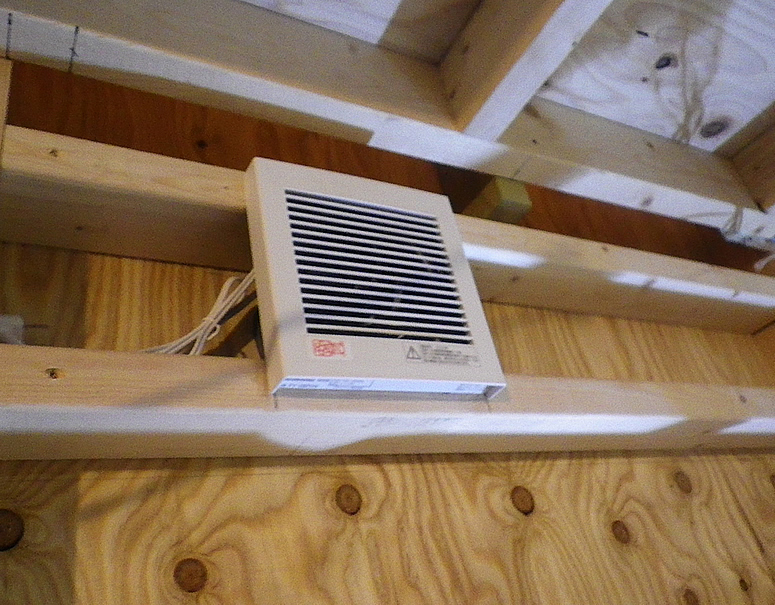
三菱電機の浴室換気扇が長時間回せて丁度良さそうなサイズだったのでこちらを使うことにしました。動作音はとても静かで、生活音にかき消されるレベルです。

step2
正面のフィンのついているカバーは爪でひっかかっているだけなのですぐに外せます。カバーを外して中の機構をみていきます。
step3
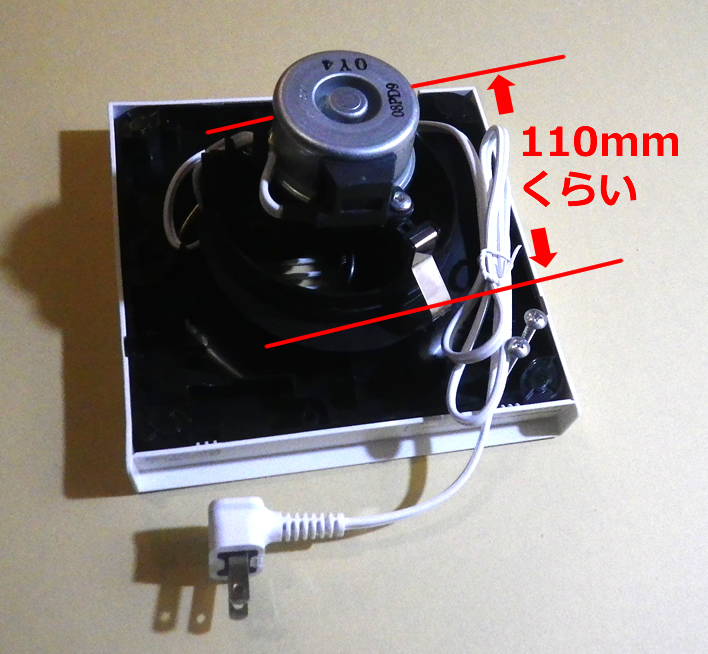
裏側の出っ張っている部分は直径110mmくらいなので、この部分をどうやってクリアしていくかを考えます。
step4
この出っ張り部分に塩ビパイプを当てがってみると、ちょうど良さそうなのが呼び径100のVU管でした。(VP管やHI管とかでも規格は同じですが今回は価格の安いVU管で十分です。)
step5
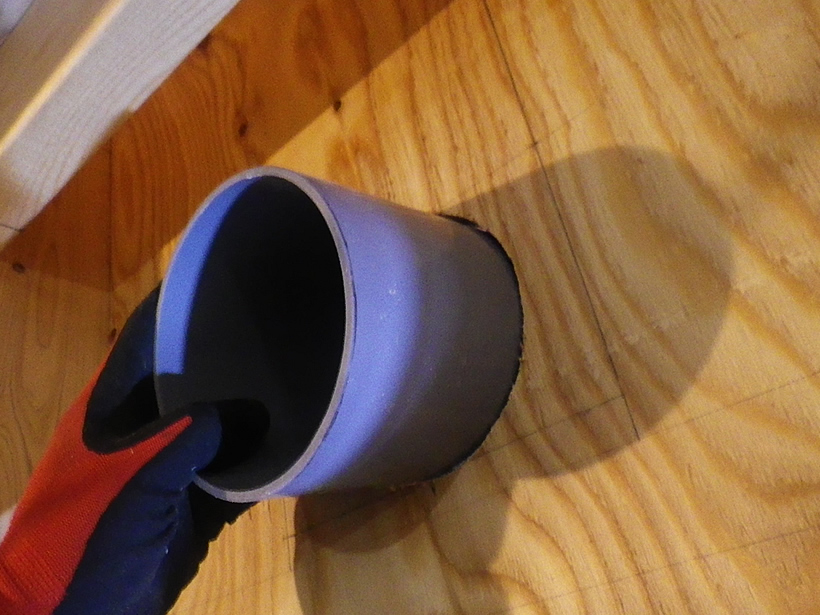
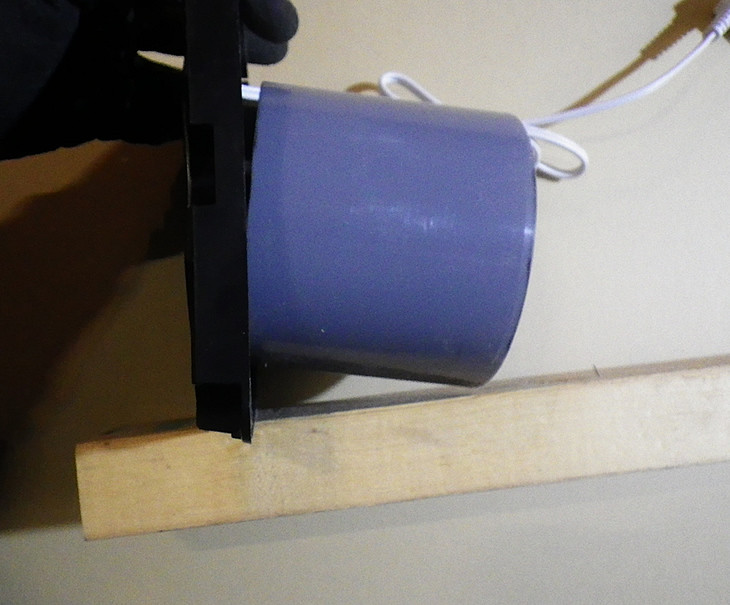
径が100とされているのですが、「呼び径」といって商品を区別するための名称の意味合いが強く、実際には写真のように寸法が違うので注意です。

step6
たまたま寸法が合いそうだったのでこのVU管100を使うことにしまして、壁にそれが入る穴を空けていきます。

step7
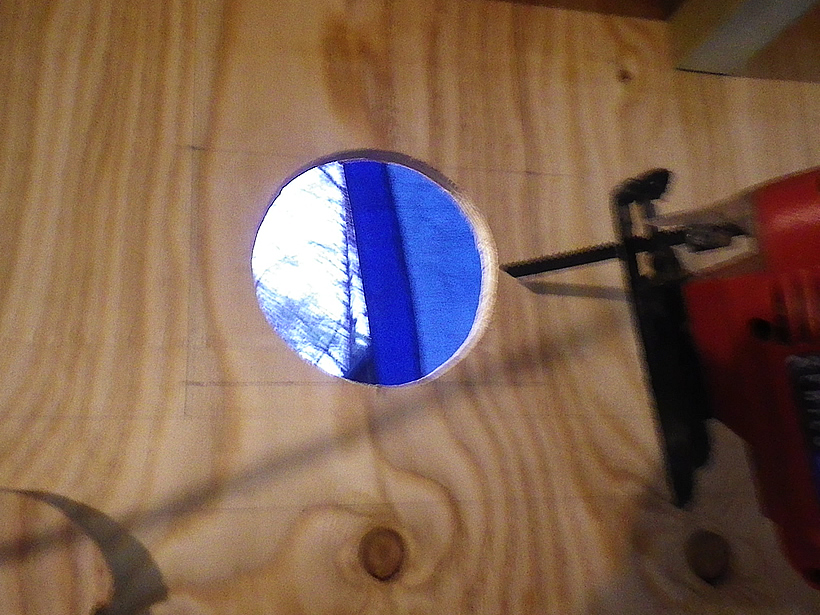
VU管を壁にあてて周りを墨付けしていくと数ミリ大きい径で書けます。直径9mmくらいの穴を空けた後そこにジグソーのブレードを入れてそこから円形に切っていくと丸く切り抜くことができます。
step8
ちょっと遊びがあるくらいに管が入るようになりました。これくらいがちょうど良いです。
step9
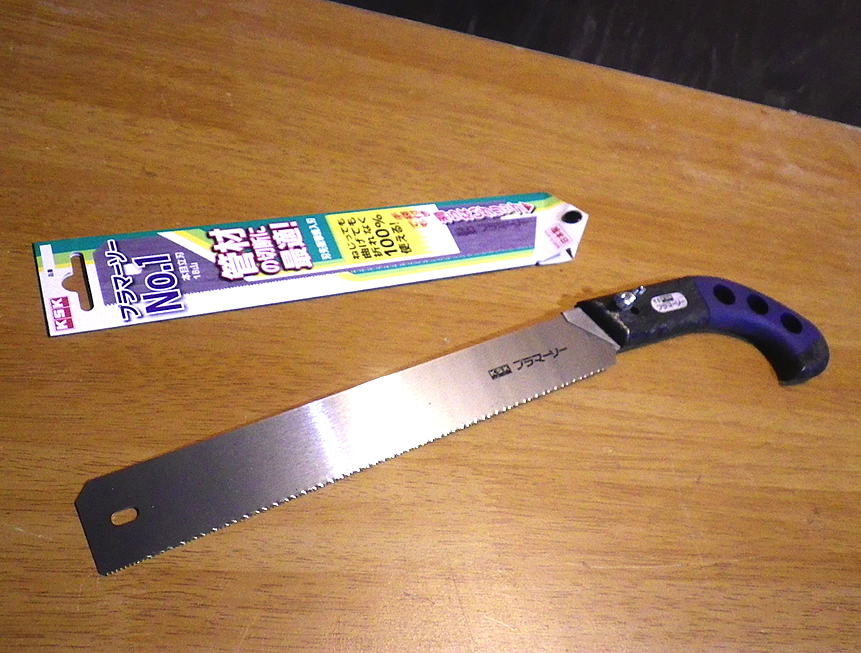
適度な長さにVU管を切りたいので、今回はプラマーソーという管材を切断する専用のノコギリを使ってみました。(小さい径ならパイプカッターで切れますがこれは径が大きいのでノコで切ります。)
step10
管にぐるりと印をつけ、以前も使ったことのある100パイプを切る用のオリジナル即席ガイドに当てがって切り始めます。
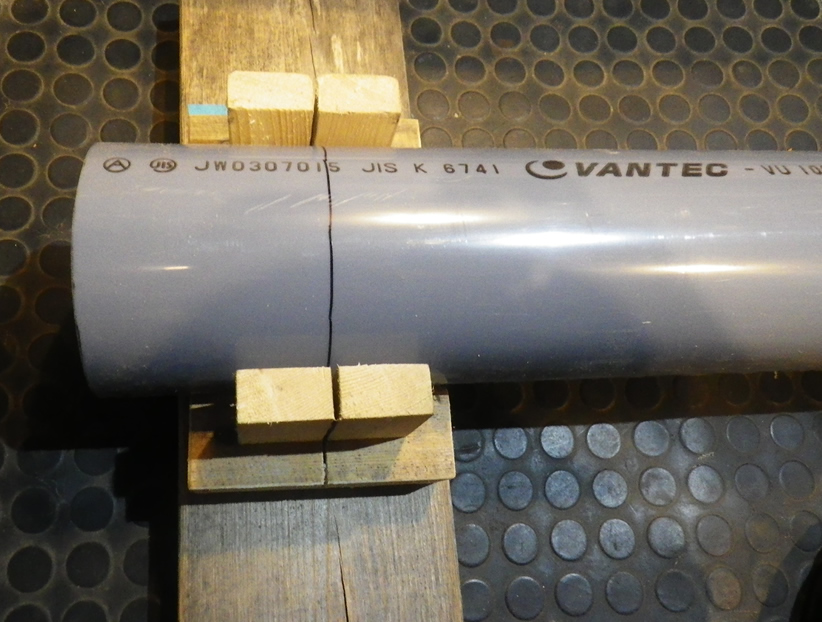
step11
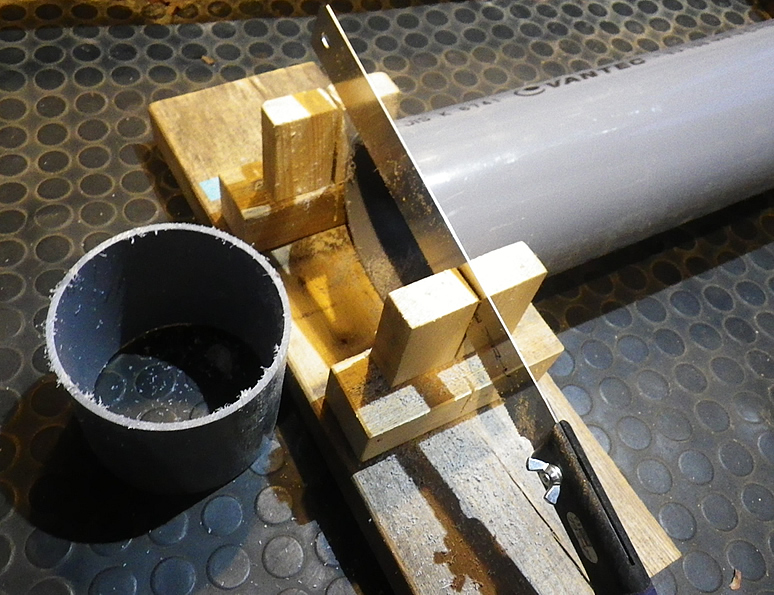
ガイドの隙間に刃を入れて切っていけば真っすぐ切り下ろせます。(金切りノコを使った時はアームが邪魔でパイプを回さないと最後まで切れなかったので不便でした。)

step12
ほぼ真っすぐ切れました。この大きさの管をガイド無しで真っすぐ切るのは至難の業なので、ガイドは必須です。電動の切断工具は基本木材用に使っていて塩ビのカスが付くのが嫌なので使いません。
step13
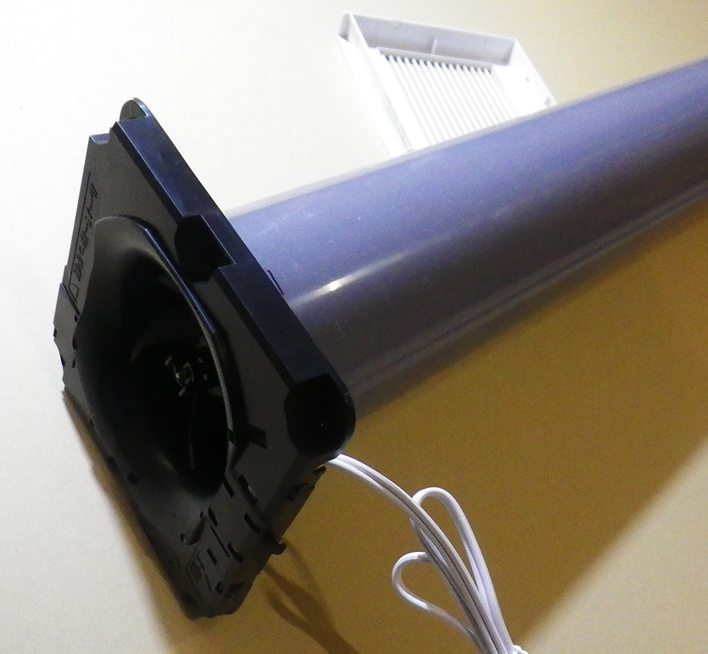
換気扇にはめ込んでみると、出っ張りがナナメなことに気付きました。ということは、写真のようにパイプの出口の位置が少し下がることになります。
step14
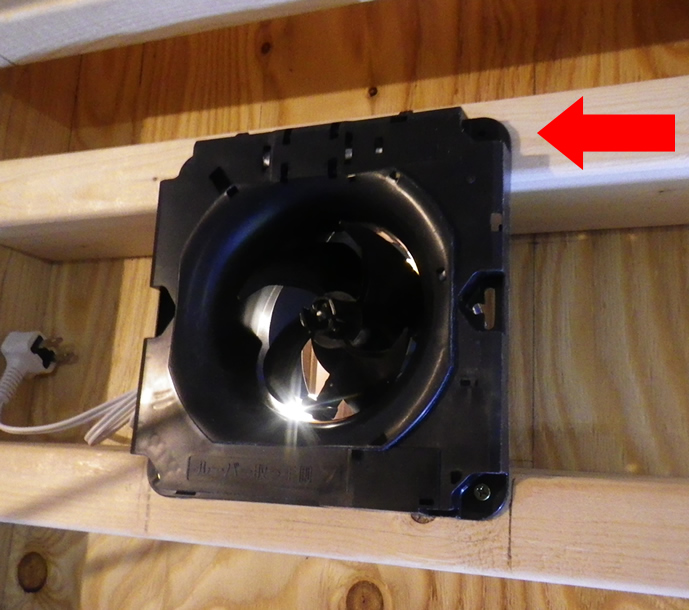
それを考慮しつつ、内壁に換気扇の正面を合わせるためオフセットを考えて土台の木材を入れて固定します。先ほどのUV管で覆っておかないと、吸い込んだ空気が壁の中に流れてしまうので管は重要です。

step15
換気扇の上部も台材を入れて固定します。パイプがナナメなので換気扇が予定より少し上に位置したのですが、上下のスペースに余裕があったので臨機応変に土台の位置を合わせられてよかったです。
step16
内壁はまだなのですが、これでひとまず換気扇の設置が完了!内壁はこの換気扇を回り込むように切り抜いて設置する予定です。
step17
外側は1cmだけパイプが出るかんじで丁度良くおさまりました。後ほどコーキングして、換気扇カバーをつけておきます。

コツ・ポイント
パイプがナナメになるかどうかは換気扇の機種によっても違うと思うので、設置前によく確認しておくと良いと思います。
やってみた感想
コンセントを引っ張ってきて、とりあえず稼働して24時間換気も可能になったので、同じ要領で換気扇をいくつか増やしていきたいと思います。

このレシピのキーワード
いいね
2
お気に入り
0
このレシピをシェア
ログインしてコメントする
このレシピを投稿したユーザー
日頃から身の回りの物や便利アイテムを作ったりしてDIYを楽しんでいます。
不便を感じたらそれを解消できる物を考え制作し、必要なパーツも市販で無ければ可能な限り自分で作ります。
大工などの経験は無いですが、今まで独自に得てきたノウハウやアイデアでどこまでやれるか日々挑戦中です!
投稿済みレシピ(153)
2024年06月30日
2024年05月31日
2024年03月27日
2024年02月16日
2024年01月30日

