


 レシピを投稿する
トップ > 「床を張る・塗る」のDIYレシピ > ★DIYでゲストハウス作ってみた★土台編
★DIYでゲストハウス作ってみた★土台編

Taatan
2021年11月04日

ゲストハウス用の超低層基礎が固まったので、その上に土台を設置していく工程になります。基礎パッキンをスペーサー代わりに使ってレベラーを均一に流せるようにしました。地味な写真が多くなりますが...何卒ご了承ください。
かかった費用: 30,000円
所要時間: 半日
いいね
2
お気に入り
0
このレシピをシェア


材料
基礎パッキン 十数枚
アンカーボルト&ナット等 十数本
調整板 数枚
100×100材 数本
アンカーボルト&ナット等 十数本
調整板 数枚
100×100材 数本
工具
コンクリートミキサー
金ノコ
万力
おたま
金ノコ
万力
おたま
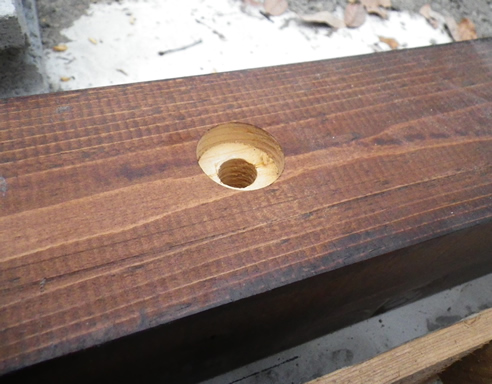
step1
作業の始めに以前のトイレ小屋の土台と同じ要領で100×100mmの角材にアンカーボルトの穴を2段階で開けて準備しました。(ボルト頭を隠すためですが、隠す必要が無い場所では2段にする必要はありません)
step2
建築では基礎の上に基礎パッキンを敷いて、その上に土台を乗せることがセオリーのようですが、素人施工でレベラーの高さ(硬化後)にバラツキが出てしまったので、高さが足りない箇所に基礎パッキンを追加して水平をとってから2回目のレベラーに埋め込むようにしました。

step3
相欠きして微妙な隙間の調整には基礎パッキン用の調整板を流用して微調整します。
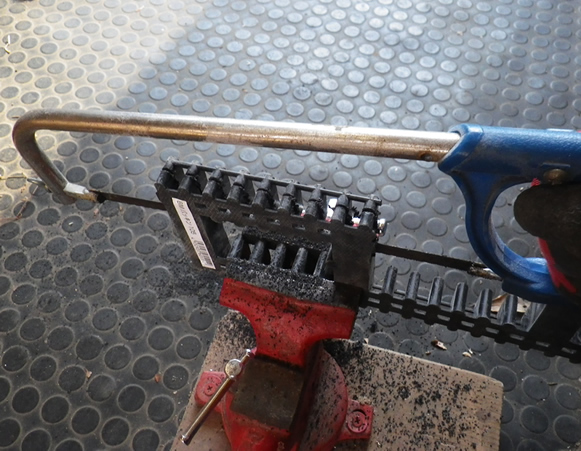
step4
調整板は市販で1~3mm程度のものしか無かったので、基礎パッキン(T20mmくらい)を万力で固定して金ノコで切ってみました。
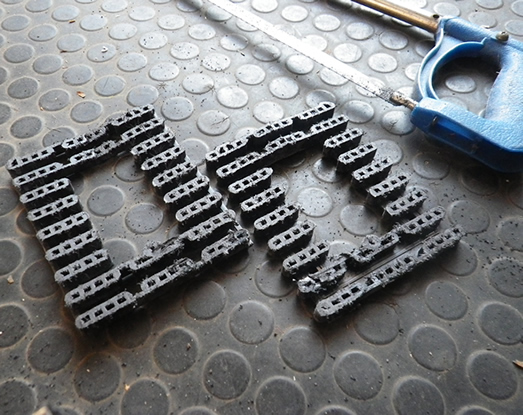
step5
「切れてるチーズ」みたいにスライスできました!これで10mm程度のスペーサーとして使えるようになったので他の調整板と組み合わせて色々対応できます。(レベラーと一体化させるので多少歪みがあっても問題ありません。)
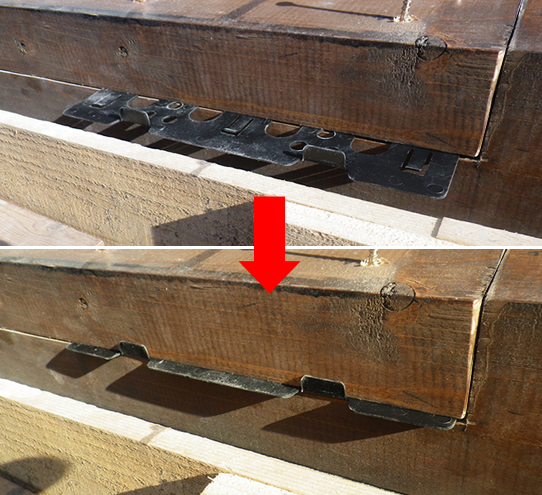
step6
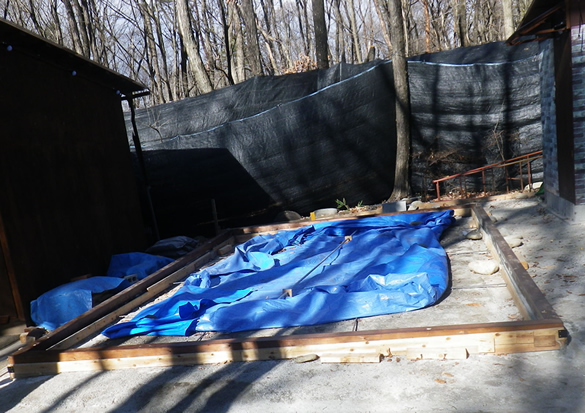
基礎パッキンの位置が決まったら、土台の下にパッキンを取り付けてから基礎の上に乗せるというセオリー無視の方法で設置します。その下に2回目のレベラーを流し込んで水平を確保するためです。

step7
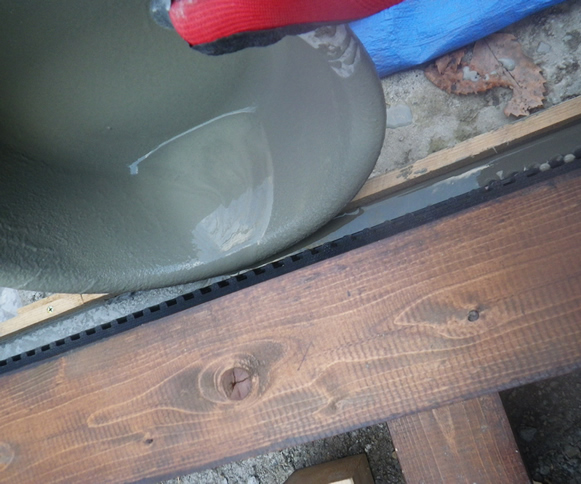
土台と枠の隙間からレベラーを流し込みますが(コンクリートミキサーを使いましたが毎回なので割愛します)少しづつなので最初は洗面器を使って流したところ・・・
step8
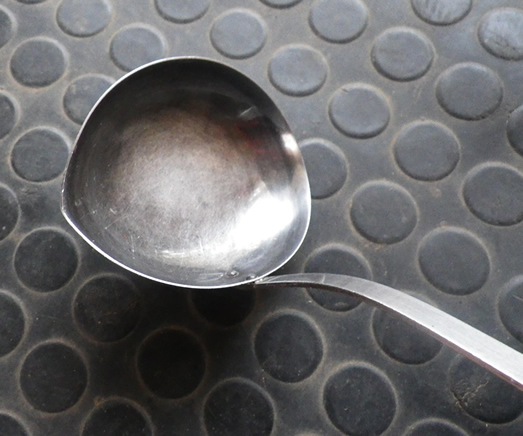
なんともやりづらいので、いらないおたまを万力で挟んで湾曲させ先端を尖らせてみました。

step9
先が少し尖ったおたまになりました。市販のものよりなめらかな湾曲です。
step10
これで隙間から綺麗に流し込むことができるようになりました。基礎パッキンが埋まりすぎないように注意して流し込みます。

step11
基礎パッキンの下側ギリギリまでレベラーを流し込み、パッキンを取り囲むかんじで固めることでより頑丈に基礎と土台を組むことができました。
step12
だいぶ地味な写真が続きましたが、この後は柱を立てたりして、また楽しい作業が待っています!体も脳みそもフル回転で挑みたいと思います。

コツ・ポイント
通気系の基礎パッキンなのでパッキン全部は埋まらないようにして、通気性を確保して湿気にも強い土台になったと思います。基礎のコンクリに直接土台を乗せると(昔は多かったらしいですが)土地によっては基礎から水分が上がってくるので腐りやすいそうです。
やってみた感想
超低層の基礎にした為、水分が上がってきやすいことは予想できたので、その点では湿気をどうするか考えながら進めていきました。この後も湿気との葛藤は続くと思います。それを考えるのもまた楽しみでもあります。

このレシピのキーワード
いいね
2
お気に入り
0
このレシピをシェア
ログインしてコメントする
このレシピを投稿したユーザー
日頃から身の回りの物や便利アイテムを作ったりしてDIYを楽しんでいます。
不便を感じたらそれを解消できる物を考え制作し、必要なパーツも市販で無ければ可能な限り自分で作ります。
大工などの経験は無いですが、今まで独自に得てきたノウハウやアイデアでどこまでやれるか日々挑戦中です!
投稿済みレシピ(175)
2026年03月29日
2026年03月26日
2026年02月28日
2026年02月26日
2026年01月31日

