


 レシピを投稿する
トップ > 「壁を貼る・塗る・飾る」のDIYレシピ > ★DIYでゲストハウス作ってみた★ロフトの通気口編
★DIYでゲストハウス作ってみた★ロフトの通気口編

Taatan
2022年12月08日

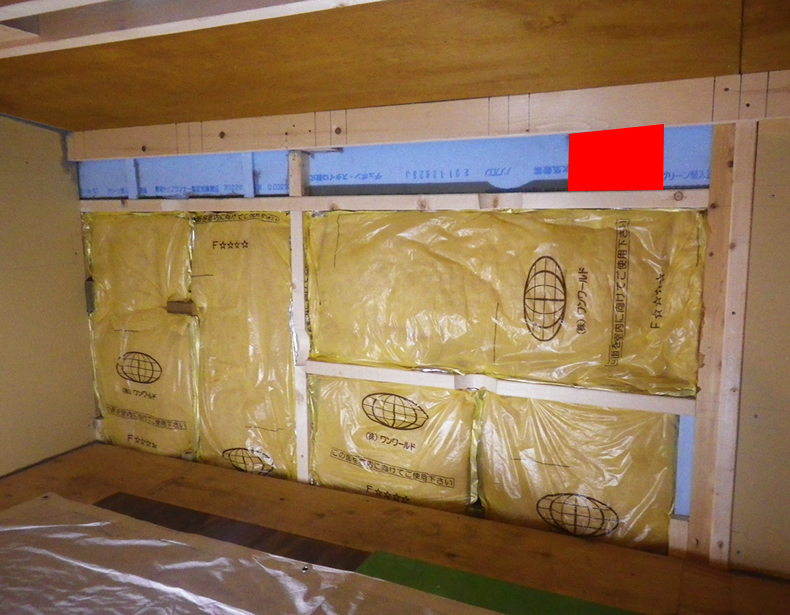
少しずつ建築が進んでいるゲストハウスのロフト部分にマドが無い壁があるので、建物の外側での作業をしやすくするため、電源コードも臨時で通せる通気口を作りました。中くらいのクランプが大いに役立ちました。
かかった費用: 1,000円
所要時間: 半日
いいね
2
お気に入り
0
このレシピをシェア


材料
2×4材12F 1本
防虫防腐材塗料 少量
木工ボンド 適量
防虫防腐材塗料 少量
木工ボンド 適量
工具
丸ノコ
テーブルソー
グラインダー
インパクトドライバ
テーブルソー
グラインダー
インパクトドライバ
step1
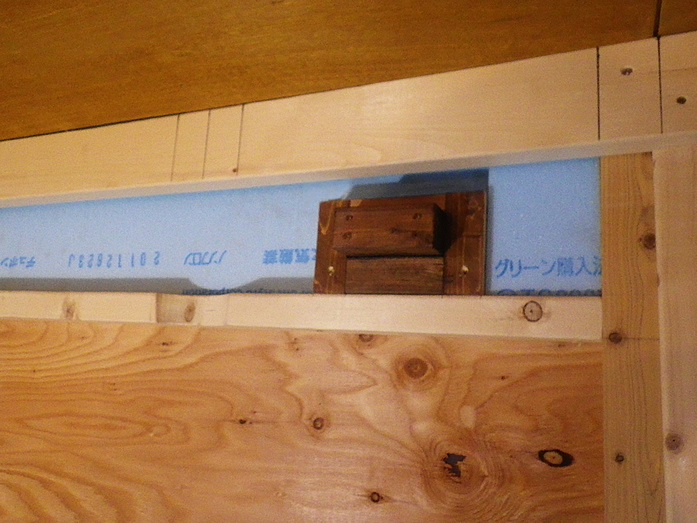
ロフト部分の壁はまだ断熱材が剥き出しの状態で、壁の上部の赤枠の部分に通気口を設けたいと思います。
step2
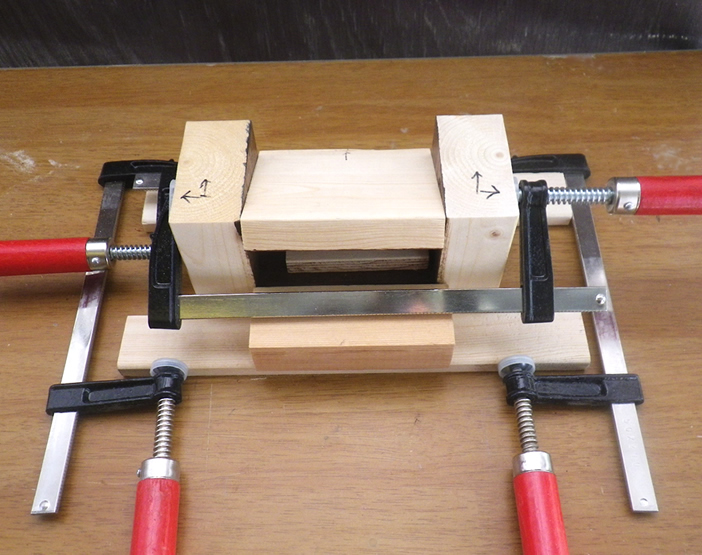
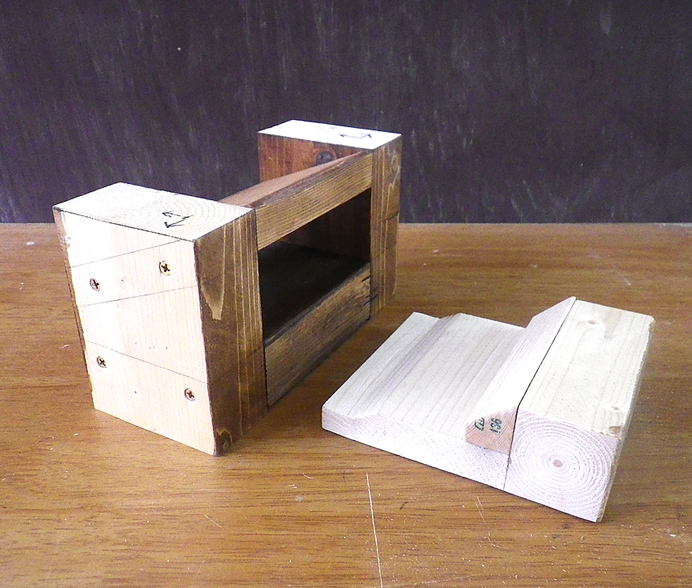
寸法を測ってちょうど収まるように材料を切り、現物合わせしながら木工ボンドで材料を貼り合わせていきます。ある程度くっついて位置が確定したらビスでしっかり留めていきます。
step3
いきなりコーススレッドを打つとクランプ固定していても振動でずれてしまったりするので、一旦木工ボンドで仮留めしてからビスを打つ方法にしました。
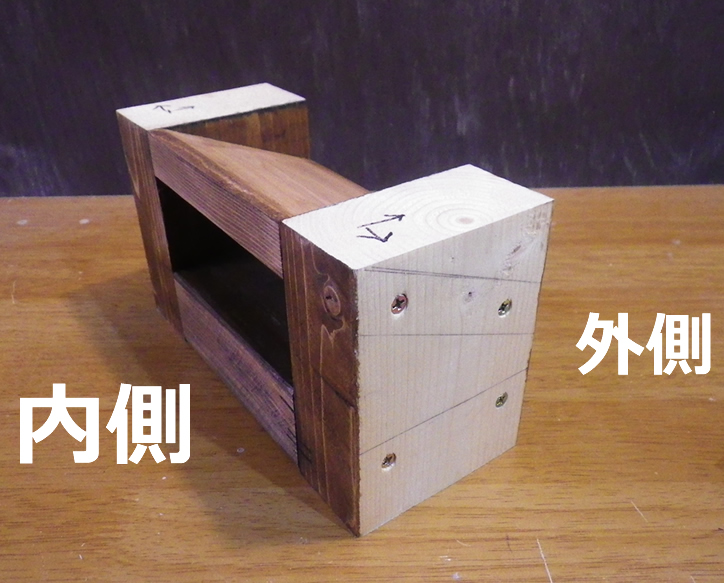
step4
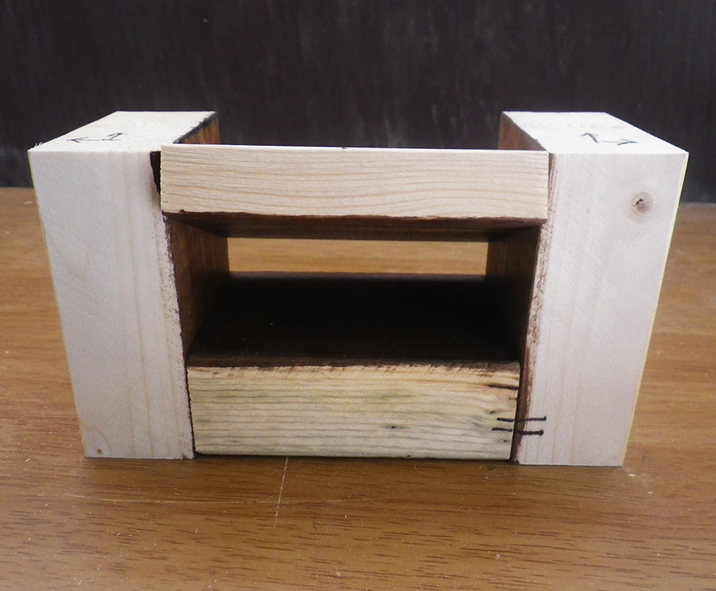
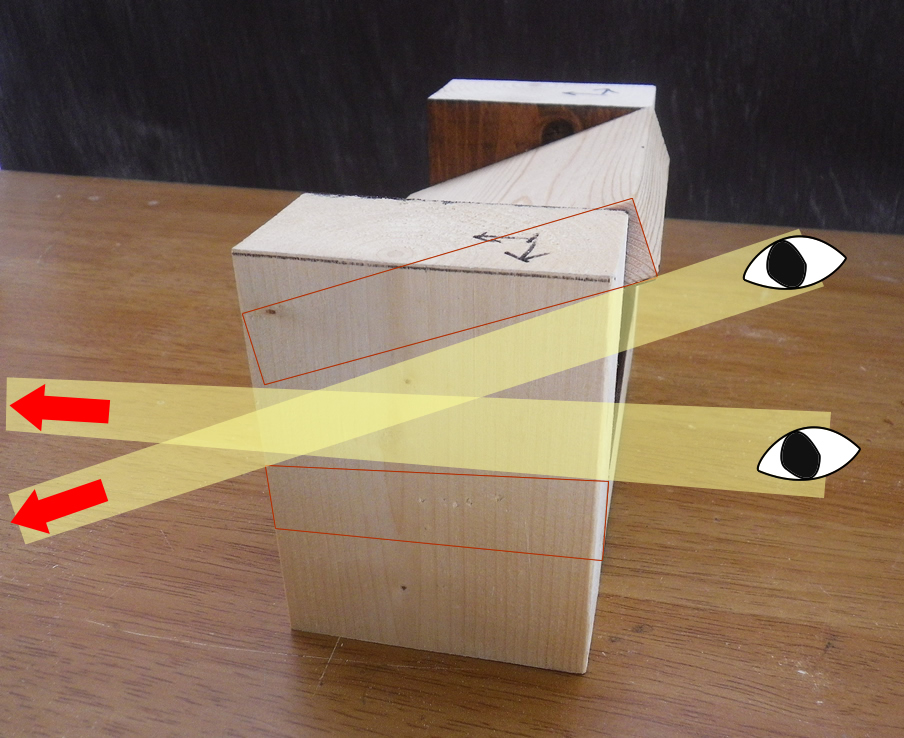
この枠の天板がなぜ斜めになっているかというと、通気口の外側はなるべく小さくしたいけど、内側からは広範囲に外を見られるようにしたかったためです。
step5
この角度をつけることで、壁が10cm前後の厚さにもかかわらず狭い出口でもより多くの範囲を見渡すことができるようになります。
step6
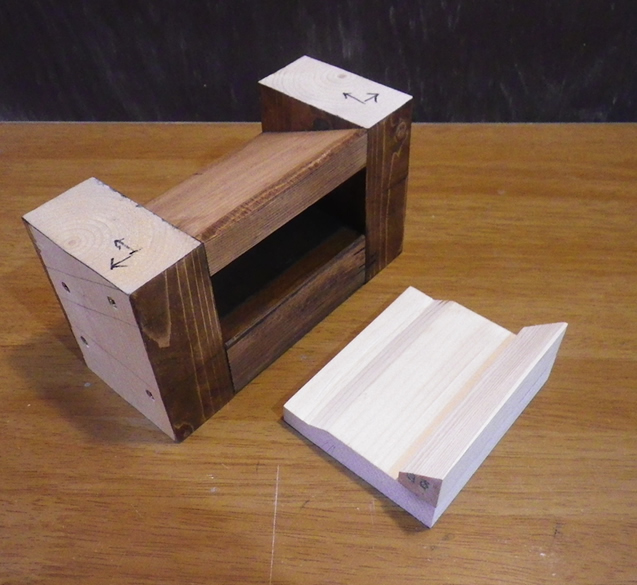
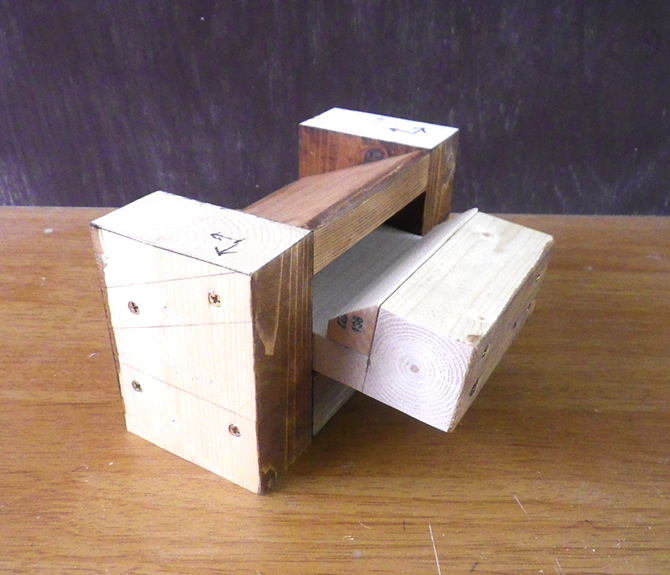
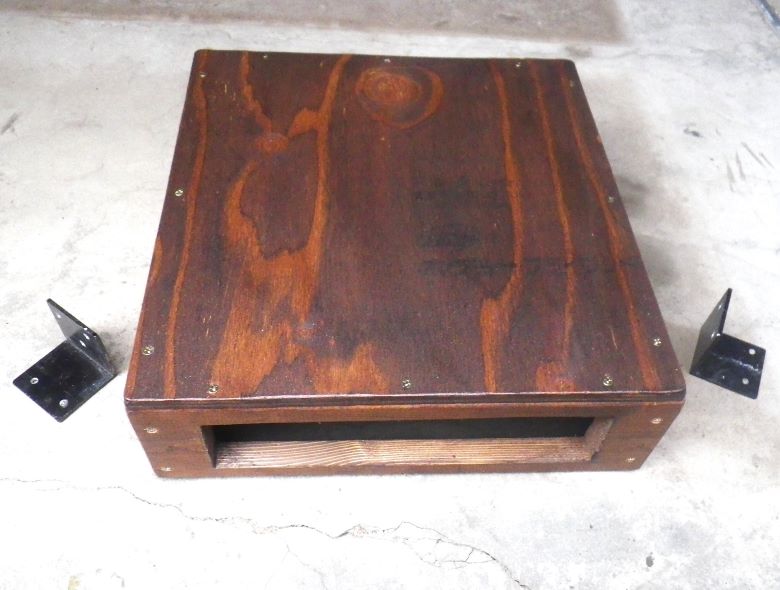
通気口を開けっ放しにするわけにはいかないので、これを塞ぐためのフタを作ります。形状が特殊なので、それに合わせて2×4材を組み合わせて作りました。
step7
これを通気口にはめ込むと・・・
step8
ピッタリ収まりました!
でもこれでは引っ張る時に取っ手も何もなくて引っ張れないので、
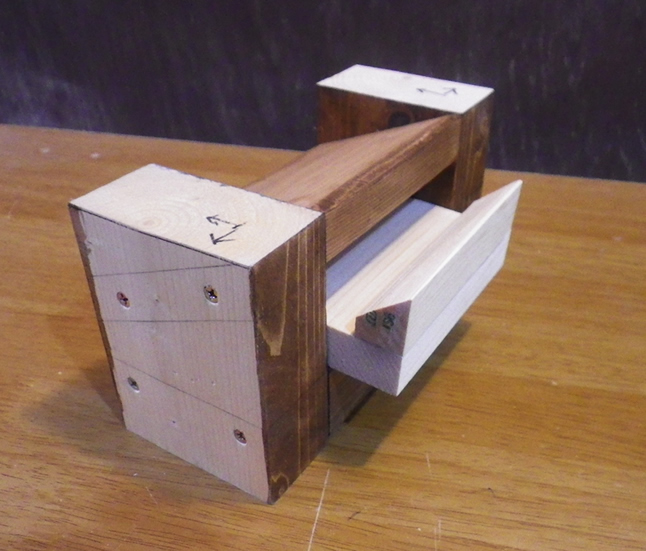
step9
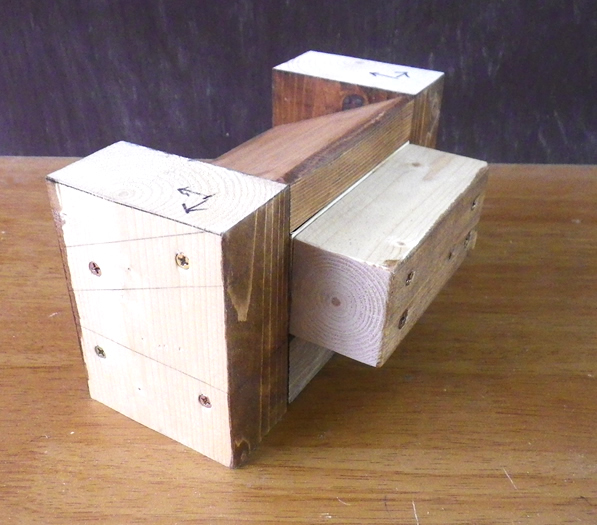
木材を追加します。一目で取っ手と分かるようにはしたくなかったので、壁の骨組みを模して四角い角材を用意しました。

step10
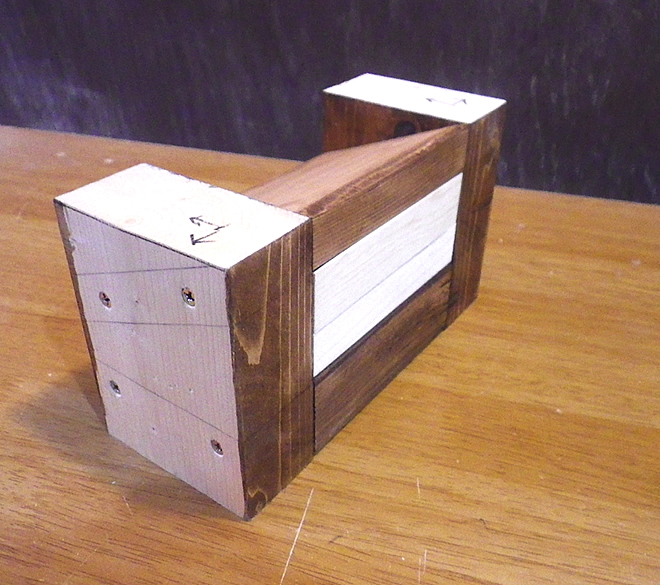
合体したこちらを再びはめ込むと・・・
step11
斜めの部分に添って木材がはいっていき、
step12
ここでピッタリ止ります。
出っ張った部分が取っ手になります。取っ手に見えませんが、それが良いのです。
step13
裏側から見るとこんなかんじで、出っ張っている部分は壁の外側のサイディングの厚さを考慮した部分です。この出っ張りがサイディングの厚さにピッタリ収まります。

step14
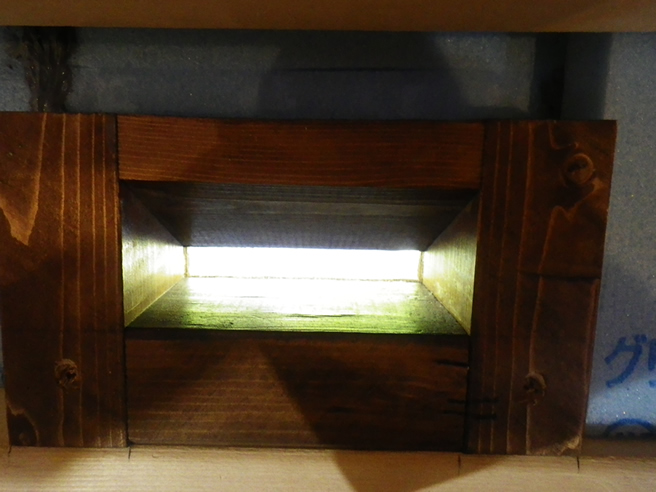
壁に穴を開けて枠を設置すると、外側の景色がこのように見えます。(写真は逆光になってしまって分かりにくいです)
step15
これで設置完了ですが、今は目立つこの通気口も、壁を貼って同系色にしていけば目立たなくなります。
コツ・ポイント
壁の厚さが枠の寸法に直接関係してくるので、最終的な壁の厚さを計算して枠を寸法を決めると失敗を防げます。
やってみた感想
この通気口をつけることで、外側の壁や屋根での作業時に延長コードを通して作業することができるようになり、概ね満足点です。

このレシピのキーワード
いいね
2
お気に入り
0
このレシピをシェア
ログインしてコメントする
このレシピを投稿したユーザー
日頃から身の回りの物や便利アイテムを作ったりしてDIYを楽しんでいます。
不便を感じたらそれを解消できる物を考え制作し、必要なパーツも市販で無ければ可能な限り自分で作ります。
大工などの経験は無いですが、今まで独自に得てきたノウハウやアイデアでどこまでやれるか日々挑戦中です!
投稿済みレシピ(165)
2025年06月29日
2025年05月16日

2025年04月27日
2025年02月28日
2025年02月13日

